The Brain Magnifying Glass Icon: A Designer's Honest Review
When a new embroidery file lands in my library, I don't just look at the preview. I think about how it will behave under the needle, on fabric, and in the hands of a customer. The Brain Magnifying Glass Icon immediately caught my attention, not just as a clever graphic, but as a potential statement piece for real projects. Let’s walk through what makes this design interesting and where it truly shines—or where you might need a bit more planning.
First Impressions: Smart, Friendly, and Versatile
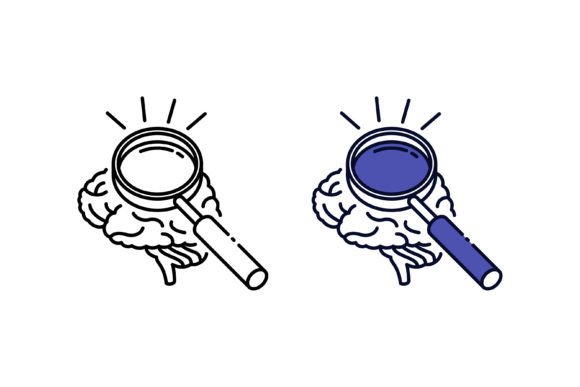
The concept is wonderfully clear: a brain with a magnifying glass, with that beam-of-light line beneath it. It’s playful without being childish, intellectual without being cold. The mood it creates is one of curiosity, learning, and friendly discovery. This isn’t a harsh, scientific icon; it has a visual personality that feels approachable. The layout is balanced, and the detail level, from the outline of the brain to the glass handle, seems tailored for embroidery—it’s defined without being overly intricate. My first thought was that this belongs on projects for educators, students, lifelong learners, or anyone in a creative field. It naturally fits on a custom tote bag for a teacher, a sweatshirt for a university club, or a patch for a librarian’s apron.
Where This Design Performs Brilliantly
In real-life embroidery situations, this icon’s strength is its thematic versatility. I recently used a similar concept for a custom embroidered pillow cover as a graduation gift, and the reaction was fantastic—it felt personalized and meaningful. For the Brain Magnifying Glass Icon, I envision it working exceptionally well on:
- Custom apparel: A clean, centered placement on a polo shirt or sweatshirt for a tutoring business or a makerspace.
- Tote bags and aprons: As a focal point for a handmade product, it adds a clever, conversation-starting element.
- Baby clothes and nursery decor: On a baby blanket or a onesie, it becomes a sweet, aspirational design for new parents who value education.
- Pillow covers and tea towels: In a home office or kitchen, it serves as subtle, stylish decor.
- Holiday and wedding gifts: Think of a personalized handkerchief or a kitchen towel for a professor or a researcher—it’s uniquely thoughtful.
- Small business merchandise: For Etsy sellers or craft fair vendors focusing on educational toys or tools, this icon can bolster brand consistency on patches or caps.
- Digital product previews: As a design asset for printable mockups, its clear shape makes for attractive listings.
The high-resolution detail mentioned suggests the file quality should support clean stitching, which directly affects visual appeal and customer trust. A crisp, well-defined embroidered icon on a handmade product elevates its perceived value and professionalism.
The Practical Considerations for Stitching Success
Now, for the realistic part. Every design has its optimal applications and its tricky spots. The Brain Magnifying Glass Icon, with its continuous outline and that fine beam-of-light line, requires some practical forethought.
You should use this design carefully on:
- Very small hoop sizes: If you’re trying to stitch this tiny, say under 2 inches, the magnifying glass details and the brain’s contours might lose clarity. Test on scrap first.
- Textured or stretchy fabrics: A heavily textured linen or a stretchy knit tee could distort the clean lines, especially that straight beam. A good, appropriate stabilizer is key here.
- Dark fabric backgrounds: The description doesn’t specify stitch colors, so you must check thread color contrast. A light design on dark fabric needs careful color selection to maintain the icon’s lightness and beam effect.
- Curved surfaces like caps: The design is relatively linear. On a curved cap front, the long beam line might appear distorted unless you adjust the placement expertly.
- Products needing frequent washing: If the stitch density is very high in the brain fill, it could become stiff on a frequently laundered item like a kitchen towel. Review the stitch density in your software before committing.
These aren’t red flags; they’re just the kind of notes an experienced embroidery designer makes to ensure the finished product looks as intended.
Embroidery Designer Notes for This Project
Before running this machine embroidery design on a final product, here’s my mental checklist:
- Always test it on a scrap of your intended fabric first. This reveals how the satin stitches or fill stitches behave with your thread and stabilizer combo.
- Check the stitch density, particularly in the brain area. Is it a solid fill or a more open running stitch? This affects the feel and durability.
- Confirm your hoop size can accommodate the design with clear margins. The beam line extends the length, so consider the total height.
- Inspect the small details—the handle of the magnifying glass and the brain’s lobes. Make sure they’ll stitch out cleanly without jumping stitches.
- Test the design in both black and white mockups. How does it look as a positive and negative space? This helps plan for light versus dark fabric applications.
- Use proper stabilizer for your fabric type. This is crucial for maintaining the design’s crispness on anything beyond a rigid cotton.
- Finally, and most importantly, check the licensing terms. The product is categorized under Icons and Graphics. Before selling finished items like embroidered patches or commercial embroidery projects, confirm that the license permits commercial use of the physical products you create.
Following these steps turns a good digital embroidery file into a great finished product, boosting buyer engagement and the giftability of your item.
Final Judgment: A Design with Clear Purpose
The Brain Magnifying Glass Icon isn’t a generic graphic. It’s a design with a clear narrative. In my practice, that’s invaluable. It tells a story of inquiry and intelligence, which resonates deeply on personalized gifts and small shop products. When stitched well on appropriate ground, it will look clean, modern, and engaging.
My recommendation is to lean into its theme. Pair it with thoughtful products for a niche audience. Imagine it on an apron for a science teacher, embroidered on a tote bag for a book club, or as a patch on a backpack for a graduate student. Its value lies in that specific, yet broadly appealing, concept. Avoid using it just as a filler design; let its meaning drive the project choice. That’s how you maximize its visual appeal and create a handmade presentation that truly stands out.
Remember, the promise of a high-resolution file is a good start, but your skill and preparation as the embroiderer bring it to life. Test, plan, and stitch with confidence. This icon has the potential to be a smart, stylish addition to your next embroidery project, whether for a client, your craft business, or a meaningful personal gift.